With the right tools and a bit of practice, you can master these simple nail designs in no time. Whether it’s an important date or special event coming up, there are plenty of reasons to get your nails looking fresh and fabulous. If you’re like most women, you likely have a few go-to manicures that you like to switch up from time to time. But when you want something simpler than your usual nail art without sacrificing that chic factor, simple line nails are the perfect solution. They may be basic, but as we’ll see below, that doesn’t mean they aren’t eye-catching. These designs are perfect for anyone who wants something simple, yet polished. So read on for easy line nail designs that anyone can do at home
Marble Nail Art
An oldie but a goodie, marble nails are a great option for anyone who loves neutral colours. Marble nails can be achieved with just one nail polish, but the best way to get the “marble” effect is to use two different nail polishes: a darker colour for the base coat and a lighter colour for the top coat. If you go with a darker colour for both coats, it won’t look as “marbled” since the colours won’t shine through each other. If you want to achieve a marble effect with one nail polish, you can do so by applying it in two thin coats instead of one thick coat.
This will allow the lighter colour to shine through the darker colour where they meet, creating an almost marbled effect. Alternatively, you can use a small paintbrush or toothpick to dab some lighter colour over the darker colour at certain spots to create the marbled look.
Sticker Manicure
If you’re looking for a cute and simple manicure as well as a way to add some decoration to your nails, stickers are the way to go. You can find a lot of different stickers at your local drugstore or beauty supply store. Pick out a design that matches your style, whether it be glittery, floral, striped, or anything in between. Sticker designs generally come in a variety of sizes that range from a small square to large ovals and circles. If you’re not sure which size to use for your nail, you can measure your nail to figure out the best fit. If you’re using a large sticker, you may want to cut it into a smaller size so that it fits better onto your nail. You can also make it pop by painting your nails a different colour or adding a coat of sparkly glitter.
Solid Nails With Colour Accent
This nail art is easy to achieve and adds a bit of colour to your nails without being overwhelming. You can switch up the colour of the accents to reflect the season or the outfits you’re wearing. To make this nail design, begin by painting your nails a solid colour. You can choose whatever shade you like, as long as it’s one that complements your skin tone. Once your nails are completely dry, use a nail art brush or toothpick to dab a different colour onto the tips of each nail. Try using a gradient colour that fades from dark to light, like blue to red. This will give the illusion that your nails are longer than they actually are.
Tip Gradient Nails
Gradient nails, in general, are a lovely way to add subtle colour to your nails. The gradient nails you’re likely to find at manicure salons often use three shades: a light pink, a darker pink, and a neutral colour such as white. However, there are plenty of ways you can achieve this look on your own. If you’re into simple manicures, simply choosing two different nail colours is an easy way to achieve gradient nails at home.
If you want the colours to blend together seamlessly, apply the darker colour to your nails first and let it dry completely before applying the lighter colour. If you want to be a bit more creative with your gradient nails, you can try using the watercolour technique. This involves applying different shades of the same colour on different parts of your nails to create a gradient effect. To do this, apply a base coat to your nails then divide each finger into thirds, painting each third a different shade of the colour you chose.
Chevron Nail Art
Chevron nails are a trendy design that can be created with a few simple steps. The first thing you’ll need to do is paint your nails a solid colour. You can choose whatever you like, but lighter colours are a good option since they’ll give the chevron design more impact. Once your nails are dry, use a nail art brush or toothpick to draw two diagonal lines at the top of each nail. You want these lines to be thick, but not too thick. If you make them too thick, they will overpower the rest of the nail. Once you’re happy with the chevron pattern, you can go for a gradient finish. This will give your nails a more colourful and vibrant look.
Half Moon Nails With Shading
Half moon nails are a fun and flirty nail art design that’s perfect for the spring and summer. To create these nails, you’ll need to use at least three different nail polishes. You can choose whatever colours you like, but a dark shade works best for the base coat, a lighter shade works best for the moon, and a neutral colour works best for the shading. Once your nails are completely dry, use a nail art brush or toothpick to paint a thin line along the bottom of each nail. This line should be slightly thicker than the line you paint at the top of your nail, but not too thick. You can also add a bit of sparkle or shimmer to your nails by applying a coat of glitter. This is a great way to make them sparkle without having to use a special sparkly nail polish.
Rainbow Nails
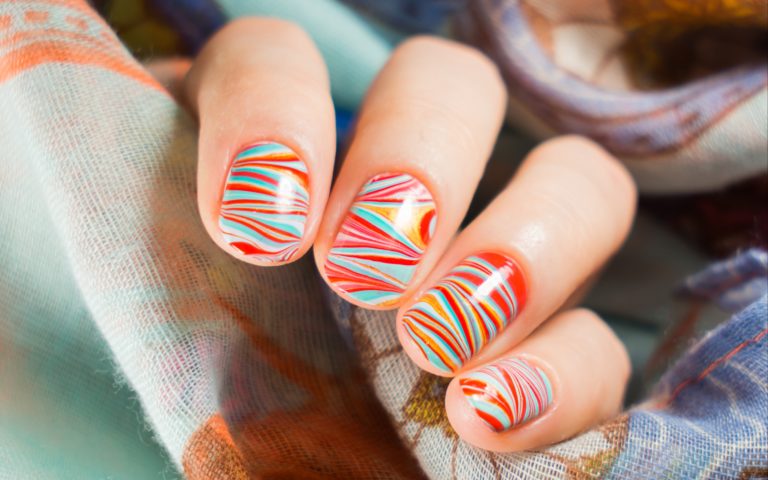
Everyone loves a good rainbow manicure, and there’s no easier way to add a splash of colour to your nails than a rainbow design. There are a few different ways you can create a rainbow design on your nails. The method you choose will depend on your preference as well as the colours you want to use. The first method you can use for a rainbow manicure is to use one colour at a time. If you choose to do this, you’ll need to use several different colours in order to achieve the full rainbow effect.
The second method you can use for a rainbow manicure is to blend different colours together. This method is best if you want the colours to blend together seamlessly. The third method you can use for a rainbow manicure is to use one colour on your entire nail. Once that colour dries, use a coloured polish to draw a rainbow on top of it. This is a great way to achieve a rainbow design without having to use a bunch of different coloured polishes.
Conclusion
Nails can be a great way to express yourself and try new things. Whether you want to create a simple and elegant manicure or something more creative and colourful, there are plenty of options to choose from. When it comes to the best way to create these designs, there are two things to keep in mind. First, always start with a base coat. Second, don’t be afraid to experiment and mix colours. No matter which design you choose, your nails will look fresh, fun, and fabulous.